Embroidery is a beautiful and satisfying craft that has been practiced for centuries. Whether you are a beginner or an experienced embroiderer, one thing that can make a big difference in the final outcome of your project is finishing it properly. One way to do this is by using a hoop. In this blog post, we will explore the benefits of finishing your embroidery projects with a hoop and the step-by-step process to do it right.
What is a Hoop?
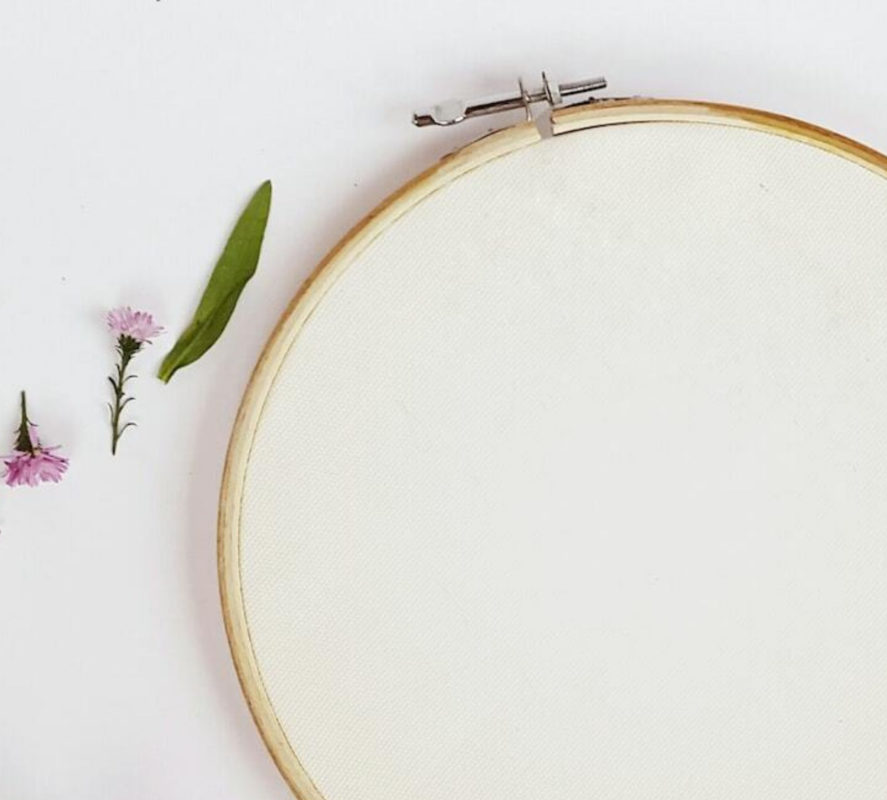
A hoop is a circular or oval frame made of wood, plastic, or metal that is used to hold fabric taut while embroidering. The hoop has an inner and outer ring, and the fabric is sandwiched between them. Hoops come in different sizes and shapes, and you can choose one that fits your project’s size and shape.
Benefits of Finishing Your Embroidery Projects with a Hoop
Keeps the Fabric Taut
One of the main benefits of using a hoop is that it keeps the fabric taut while you are embroidering. This is important because when the fabric is loose, it can cause your stitches to be uneven or puckered. A taut fabric ensures that your stitches are consistent and the final product looks neat and professional.
Prevents Wrinkles
Using a hoop also prevents wrinkles from forming on your fabric. This is because the fabric is held tight and flat, which makes it easier to work with. If wrinkles do form, it can be challenging to remove them, and they can affect the final product’s appearance.
Makes Embroidery Easier
Embroidering with a hoop makes the process easier and more comfortable. It provides a stable and even surface to work on, making it easier to create uniform stitches. The hoop also allows you to work with both hands, which can speed up the process and reduce hand fatigue.
Protects the Fabric
Lastly, using a hoop protects your fabric from getting dirty or stained. When the fabric is stretched and held taut, it is less likely to come into contact with anything that can stain or damage it. This is especially important if you are working with delicate or expensive fabric.
Steps to Finishing Your Embroidery Project with a Hoop
Step 1: Choose the Right Hoop
The first step in finishing your embroidery project with a hoop is to choose the right hoop. As mentioned earlier, hoops come in different sizes and shapes, and you need to choose one that fits your project’s size and shape. The hoop should be large enough to hold your fabric taut but not too large that it is difficult to handle.
Step 2: Place the Fabric in the Hoop
The next step is to place your fabric in the hoop. To do this, loosen the outer ring and separate it from the inner ring. Place the inner ring on a flat surface, and then place your fabric over it. Make sure that the fabric is centered and straight.
Once the fabric is in place, place the outer ring over the fabric and inner ring. Gently push the outer ring down over the inner ring, making sure that the fabric is taut. Tighten the screw on the outer ring until the fabric is held securely.
Step 3: Start Embroidering
Once your fabric is secured in the hoop, you can start embroidering. Work your way around the hoop, making sure to keep your stitches even and consistent. Remember to move the hoop as you work to make sure that you are always working on a flat surface.
Step 4: Remove the Fabric from the Hoop
When you have finished embroidering your project, it is time to remove the fabric from the hoop. To do this, loosen the screw on the outer ring until it is loose enough to remove. Gently pull the fabric out of the hoop and remove any excess threads or fabric that may be caught in the hoop. Be careful not to damage your embroidery as you remove the fabric.
Step 5: Finishing Touches
Once you have removed your embroidery from the hoop, you may want to do some finishing touches to complete your project. This could include ironing the fabric to remove any wrinkles or adding a backing to your embroidery to give it some extra support.
Conclusion
Finishing your embroidery projects with a hoop is a simple yet effective way to ensure that your final product looks neat and professional. Using a hoop keeps your fabric taut, prevents wrinkles, makes embroidery easier, and protects the fabric. By following the step-by-step process of choosing the right hoop, placing the fabric, embroidering, removing the fabric, and doing some finishing touches, you can achieve a beautiful and well-finished embroidery project.